EditRegion3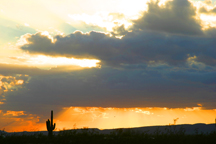 |
Taking The Shot! - Photographing
Cowboy Action Shooting
This article by Mr. Quigley
appeared in 2003 SHOOT Magazine and is reprinted here
with their permission.
It was a long shot. The
horse and rider were approaching fast and the rider was
already shooting his pistol. Aiming carefully, stock firmly
against my shoulder, waiting for the right shot. That
moment came and I gently squeezed the trigger. "Click".
No explosion no recoil. The camera captured a moment of
time now known as our past.
 Let
me introduce myself. Mark Quigley, (by the way that's
my real name), of Mr. Quigley Photography. I specialize
in Cowboy Action Photography. Our company slogan is "We
never miss the long shots". As I travel around the
country photographing Cowboy Action Shooting events, people
are always asking me questions. How do I take such good
photographs? They want to know how they can take better
photos of their friends and family participating in CAS
shooting. That's not a simple question to answer, but
let's break it down into several parts. Let
me introduce myself. Mark Quigley, (by the way that's
my real name), of Mr. Quigley Photography. I specialize
in Cowboy Action Photography. Our company slogan is "We
never miss the long shots". As I travel around the
country photographing Cowboy Action Shooting events, people
are always asking me questions. How do I take such good
photographs? They want to know how they can take better
photos of their friends and family participating in CAS
shooting. That's not a simple question to answer, but
let's break it down into several parts.
Camera safety
Photographing Cowboy Action Shooting (CAS) is very different
from all other types of photography. It can be very challenging.
It can also be a very costly type of photography. By this
I mean most CAS events are held in very dusty environments
and dust destroys cameras. I recommend always keeping
your camera in a zip lock bag in your shooting cart or
some place safe when you are not using it. One of the
biggest hazards in this type of photography is flying
lead. Realize that photographing along the front lines
were the action is, increases the possibility of your
camera getting hit by lead. We have all been hit by lead
in this game, but a flying piece of lead into your cameras
front lens element will permanently scratch or break the
lens or will degrade the quality of your final image.
I use lenses that cost more than $2,000 dollars each and
a hit like this can be very costly. For this reason, I
strongly recommend using a UV or a polarized filter on
the front of your camera's lenses. Using a polarized filter
will also give you much more colorful images. Some of
the new point and shoot APS, 35mm and digital cameras
will not allow the use of screw in filters. You can buy
commercial adapters at professional photographic stores
or use an extra large filter and rubber band it around
the cameras lens and body. That way if the lens gets hit
by flying lead you replace only $200.00 filter instead
of the entire lens. Let me also suggests that until you
are ready to take the photograph always point the camera
in the opposite direction of the shooting range. I use
my body to shield the camera and lens when photographing
on the firing line. Lastly be aware that flying lead might
crack cameras made of plastic. My camera bodies are built
of all metal construction and if you look them over you'll
see little dings and dents in them from flying lead. Okay
with this said let's move on.
Digital cameras
More and more people are using digital cameras these days.
They are fun and self-gratifying because the photo is
instant and you can see it moments after you have pressed
the shutter. It makes it easier to see if you have actually
captured the moment and made a good photograph. Digital
cameras also have drawbacks. Some magazines will not accept
digital files, or if they do, they want only professional
level digital camera files of 6 to10 mega pixels or more.
Another drawback with digital cameras is what is called
shutter lag. In other words when you push the button to
take the photo, especially in action photos, the camera
does not take the photo right away. Instead it takes it
a few seconds later after the shutter button is pressed.
This can be very frustrating. The only way around this
is to anticipate your shots a few seconds before they
occur. So when you're taking group photos and you tell
everyone to say cheese press the button first wait two
three seconds and then tell everyone to say cheese. Every
digital camera is little different, so you'll need to
learn how much shutter lag yours will have. The other
drawback is you now become the processor rather than the
photo lab. You used to drop off the film to be processed,
you now need to do this step. That means downloading cleaning
up and adjusting each photo and printing each photo. All
digital cameras photos need this processing step to give
you better prints. Many people complain about the quality
of their digital camera prints, but when I quiz them a
bit I find they have skipped the processing step. This
can be a time-consuming process. This also requires that
you gain some expertise in computer imaging software.
If you like doing this kind of thing, this can also be
a fun part of the process, but again time-consuming. This
is one reason why film cameras are still more popular.
Film and shutter
speeds
One of the most ask questions, after what kind of camera
do I use, is what kind of film to use? That all depends
on the type of lighting each day is giving off. What I
recommend most is a fast medium grain film around 400
speeds to stop and capture the action. Sometimes you'll
need more than this. If you're using a digital camera
400 ASA is a good place to start.
Most people let their sophisticated cameras make the photographic
decisions for them. I do not recommend this. Always tell
your camera what kind of conditions you are photographing
under. The camera does not know this is a fast-paced action
photograph or a portrait unless you tell it. Modern cameras
have made this process much easier. Most good quality
cameras these days have little icons on them that you
can set the dial to and then the camera knows what kind
photograph you're trying to take and it compensates for
you. In other words, if you are trying to capture fast
action, dial in the little running man icon on your camera.
For portraits dial in the little portrait setting. For
the overall photograph of the stage the landscape setting
might be best. Just by doing this, you'll see an overall
improvement in your photographs. If you have an older
less sophisticated camera, keep your f-stops small and
your shutter speeds at 1/500 hundred of the second or
faster. I usually try and shoot at around 1/1000 of a
second to completely freeze fast-paced action and choose
slower speeds (1/60) for other kinds of images.
Flash
Most people never think of using flash during the day.
Because cowboys and cowgirls always wear that huge thing
on their head called a cowboy hat, a shadow is almost
always cast upon their face. You'll need to fill in this
shadow with what is called “fill flash”. This
means that you will fill in that shadow area with the
cameras flash and see details in the face. Again, with
most cameras these days you'll need to find out how to
turn on this feature, because these cameras will not automatically
flash under daylight conditions. Refer to your owner's
manual for this. If you are placing a flash unit on top
of a 35mm camera, set your flash unit to about 1/2 its
normal power, so it will not over flash the face. Your
goal is just enough flash to see facial details. A little
experimentation might be needed here with all the different
kinds of flashes out there.
The moment
This is what I believe to be the most important part of
photography. It's one of the elements that makes my photography
so successful. Some people refer to this short piece of
time as a Kodak moment. Everything comes together for
usually one of five seconds and you must be quick to capture
it on film. If you got the shot this Kodak moment also
refers to another photographic cliché, "a
good photograph is worth 1000 words". These Kodak
moments are very spontaneous and not set up (posed). They
make the best photos. So how do you capture them? First,
you have to be ready for that moment of time to happen.
As a photographer you watch for it. You preset your camera
settings to match the lighting and other existing conditions,
so that when it happens all you need to do is frame and
shoot. For some people it takes a special eye to see these
moments and some people naturally have this keen sense.
This unique sense of seeing can be developed. I like to
teach my students a little saying: "Eyes that look
are common-but eyes that see are rare.” Like anything
else, practice seeing these moments any time during the
day with anything you're doing and you will develop this
unique sense more and more overtime.
Light
Light always makes or breaks a photograph. In CAS photography
there are basically three types of light. We have overcast
days, harsh contrasting middle-of- the-day light, which
is the most undesirable. The third and best light is found
during the morning or the evening. All good photographers
shoot during these times and so should you. So if you
have a shooting event you want to submit a article and
photographs for, plan on taking your photographs during
these two times. Plan your posse or group photos also
at these times. The light will be much softer more pleasing
and colors will be much brighter. The photographic magazine
editors will be more likely use your photographs.
Backgrounds composition
and focus
By leaving backgrounds neutral, your photographs will
look uncluttered and professional looking. To get this
look you need to place your subjects in an area that has
a beautiful background or one that is appropriate to the
photograph. If you're not able to do this, look through
the lens and find a pleasing angle. If you're not sure,
take a few photographs from different angles. Also using
small f-stops will blur the background and cause viewers
to focus more on your main subjects. Always focus on the
person’s eye rather than anywhere else on the person,
unless something else is your point of interest. The first
place people look when they are viewing photos is always
the human eye. The eyes should always be in focus.
Documenting your
shooting event
Now with what we have learned so far we will combine all
of the above and document your shoot for your scrapbooks,
friends and family, websites or magazine articles. To
do this you'll need to start thinking like a reporter.
You'll need to go back to the cliché a good photograph
is worth 1000 words and start taking certain types of
photos. Let me give you a few ideas on how to do this.
1. Stand back and take overall
photos of what the event looked like.
2. Take photos of your groups and attendees.
3. Don't forget to photograph the winners.
4. Look for that Kodak moment.
5. Includes some of your best-dressed attendees.
6. Includes some good action images.
Making prints
I recommend to most people to just take your print film
to Wal-Mart or Walgreen’s. I realize I'm recommending
a certain chain here but these two stores do a very good
job at processing film for reasonable prices. If you're
not happy with your prints, they will also redue their
mistakes. Now if you have a good photo and you want to
make a large print, I strongly recommend that you use
a professional photo lab in your town that does their
own printing. These labs will always do a better job for
you on enlargements than Wal-Mart or others. Yes, you'll
pay more for their work, but you'll also be much happier
with the results. It's one of those times “you get
what you pay for” things. Protect your prints by
placing them behind glass and framing them. Always place
your prints in areas where the sun will not directly shine
on them. All photos fade overtime, but this will delay
the fading process.
Submitting your
work to magazines
Most magazines will want your submissions to be, transparencies
(slides), negatives, or high-quality high-resolution digital
files usually in this order. Never send prints made from
your home inkjet printer or 4x6's made from Wal-Mart.
If the editor wants digital files from your slides or
negatives you can take your slides to your local lab and
they can create high-quality digital scans in order to
meet this requirement. Have your scans put on a photo
CD ROM. Also anticipate that you will not get your work
back. Make sure you label everything carefully by the
name of the shooting event as well as your own name as
a photographer.
Brands of cameras
In the beginning I told you that one of the most asked
questions of me is what kind of camera do you use? Really,
when you come down to this question it is the least important
question in photography. It matters much more if you combine
the above suggestions rather than the brand of camera
you use. This can also be a Ford, Dodge, Chevy argument,
which basically means, what you like or prefer. Okay you
still want to know right? I have been photographing since
the early 1970s, and have used Pentex, Nikon, Minolta,
Hasselblad, Mamiya, Leica and Cannon. In the mid 1980s,
I switched to Cannon because of better technology in their
focusing systems, and have stayed with them because of
the quality and many choices of their lenses, as well
as better technology right now in the digital realm. Now,
I'm talking only high-end cameras. If you're looking for
a non-pro camera I recommend to people the following brands.
Canon or Nikon for 35mm, both build excellent systems.
I do not recommend the APS format to anyone because of
the quality, and magazines will not accept it. For digital
cameras, I recommend Cannon, Nikon and Fuji. Cannons are
known for their ease of operation, quality sensors, while
Nikons can be little more sophisticated. Fuji’s
are the good all-around choice. All of these brands have
excellent glass in the front.
If you're in the market
for a new camera buy some photo magazines and do some
research on your own. Then go to a professional camera
store and try some out. You can ask the salesperson specific
questions at these stores and you will get better advice
than you will from Wal-Mart or Kmart salespeople. If you
want more specific information feel free to write me and
I will send you that information if you include a self-addressed
stamped envelope.
Well of course there are
a lot more issues we could talk about when it comes to
CAS photography, but by applying the steps we've talked
about you will become a better photographer. I always
recommend to people who want to learn more about photography
to take a basic or advanced photo class at their local
community colleges. Lastly, take lots of photos because
film is the cheap part of photography. Don't forget to
experiment with your camera and have fun. Remember to
be a straight shooter in life as well as with your camera
and guns.
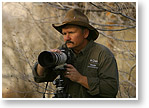
About Mr. Quigley
Mr. Quigley has been photographing people in the outdoors
since the 1970s. He uses 35mm, 6x7 centimeter and digital
formats for his work. Mark is a self-taught photographer
and his work has been published in many different magazines
and calendars throughout the world. He specializes in
Cowboy Action Shooting both horse and ground as well as
ranch, firearms, hunting, fishing, portrait and nature
photography.
› › quick
shots ‹ ‹
- campfires
& fishing
- Taking
the shot!
- Gillette,
Az
- tip
top, az
- Indian
mesa, az
|
